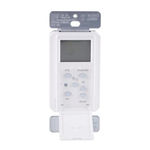
□ This timer will work in a single-pole or 3-way installation. It will not work in a 4-way installation.
□ This timer will only work on loads up to 15A.WARNING: Shut off power at the fuse box or circuit breaker before performing any wiring or installation.
BASIC WIRING TERMINOLOGYTo better familiarize yourself with the wiring terminology and concepts referenced in this manual, please review the following information before you begin wiring this timer to your switch outlet.
If at any time during the wiring process you become uncertain, please contact a certified electrician.
□ Line: 120VAC (hot) wire that supplies voltage from the breaker box to the wall outlet □ Load: 120VAC (hot) wire that connects the wall outlet to the device (load) being controlled □ Neutral: 120V return connection completing the circuit to the breaker box □ Ground: 120V safety wire providing a path for electricity to be discharged□ Traveler-1 and Traveler-2: wires running between two 3-way switches for installations where an outlet is controlled by two switches
INSTALLATION OPTIONSTo begin the installation process, you must first know what type of installation is needed. Below are the three different installation options. Please refer to the following descriptions for the installation
instructions that apply to you. 1 Single-Pole Installation (Go to install section 1 on page 2):This installation option should be used when a switch only controls one outlet from a single location. Typically you would find a single-pole switch in your bedroom or bathroom.
2 3-Way Installation, Load Side (Go to install section 2 on page 2):This installation option replaces a switch which controls an outlet that can be controlled from two separate switches and in most installations has the common (hot) terminal tied to the
device/load. The switch turns OFF and ON. Typically these types of installations are in stairwells, hallways, and large rooms with multiple access points.
3 3-Way Installation, Line Side (Go to install section 3 on page 2):This installation option replaces a switch which controls an outlet that can be controlled from two separate switches and in most installations has the common (hot) terminal tied to
120VAC. Typically these types of installations are in stairwells, hallways, and large rooms with multiple accesses points.